
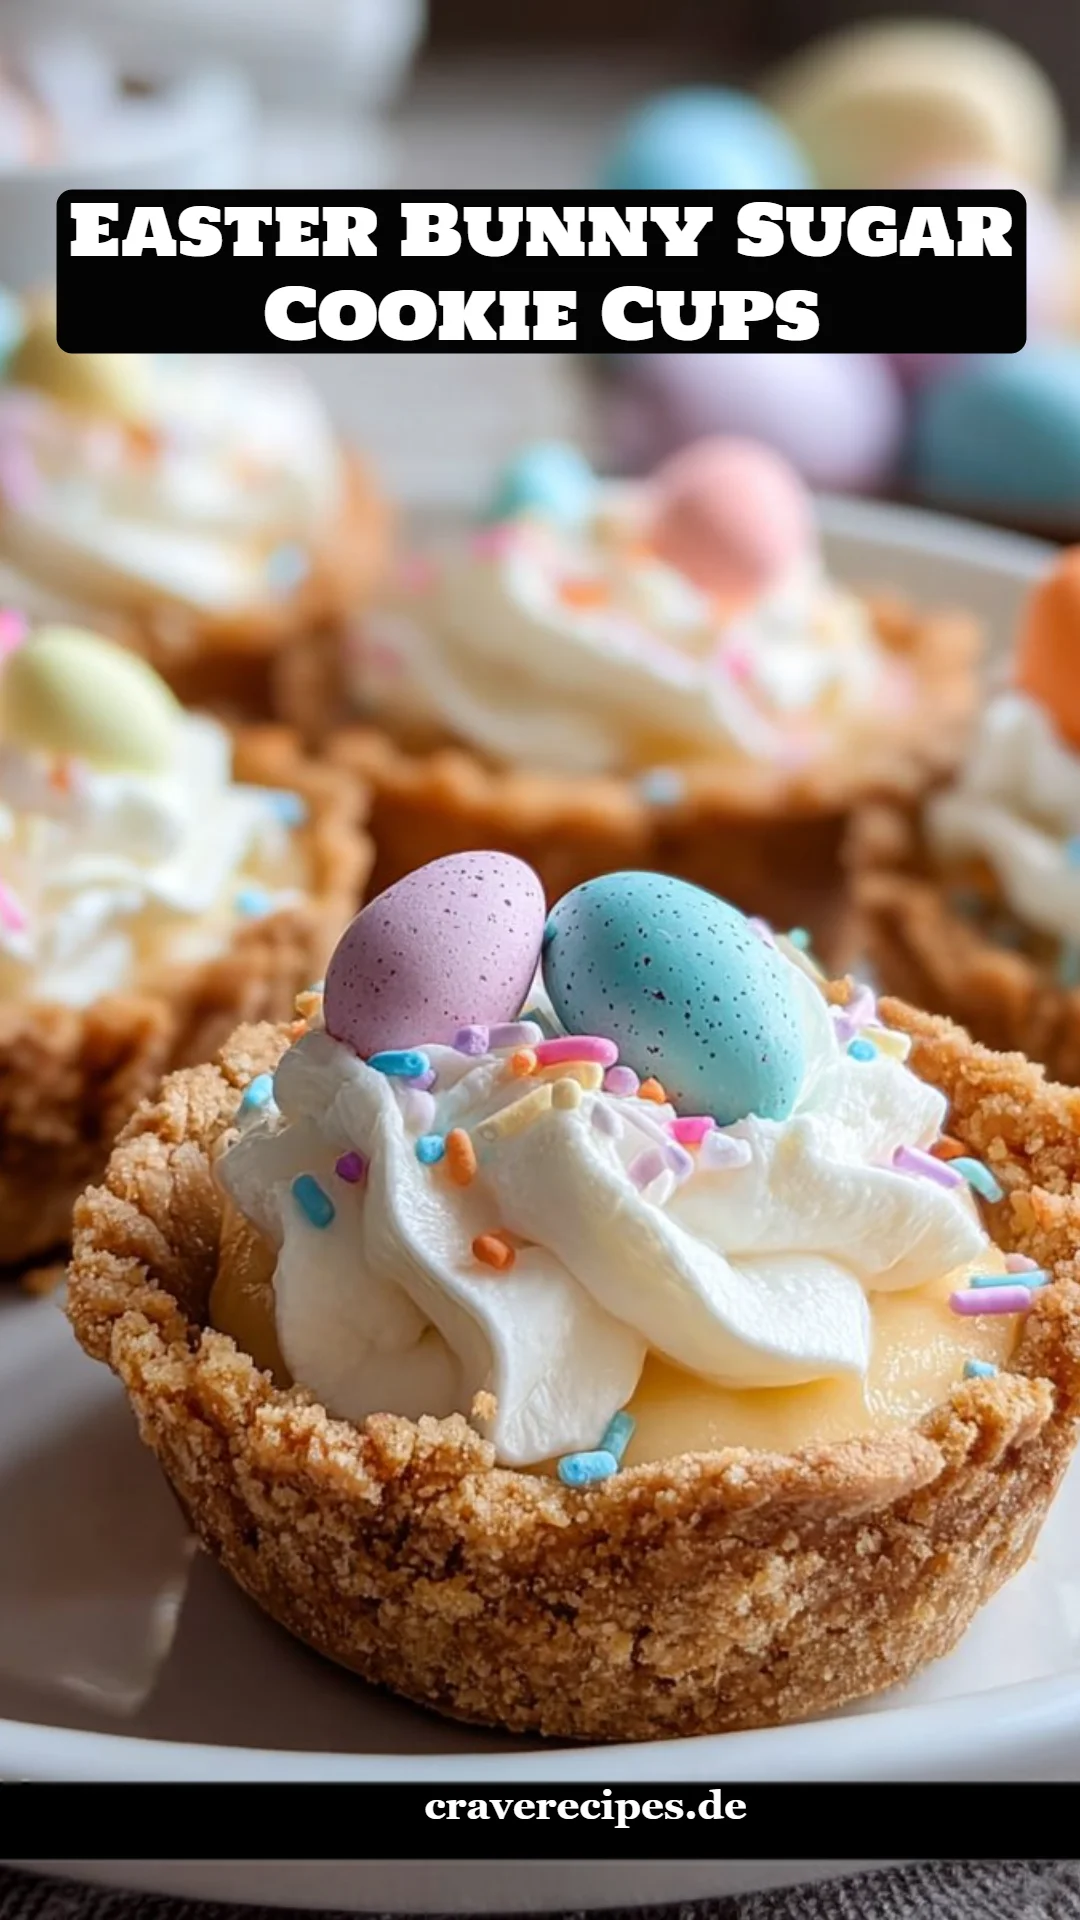
Delightful Easter Bunny Sugar Cookie Cups: A Sweet Treat for Spring Celebrations
Easter is one of my favorite times of the year, filled with blooming flowers, family gatherings, and, of course, delicious treats! One of my fondest memories is when my mom and I would spend hours in the kitchen, whipping up several batches of festive cookies. This tradition led us to create the delightful Easter Bunny Sugar Cookie Cups, a recipe that has become a staple in our home. These adorable, mini cookie cups are not only visually captivating but also bursting with sweetness and nostalgia.
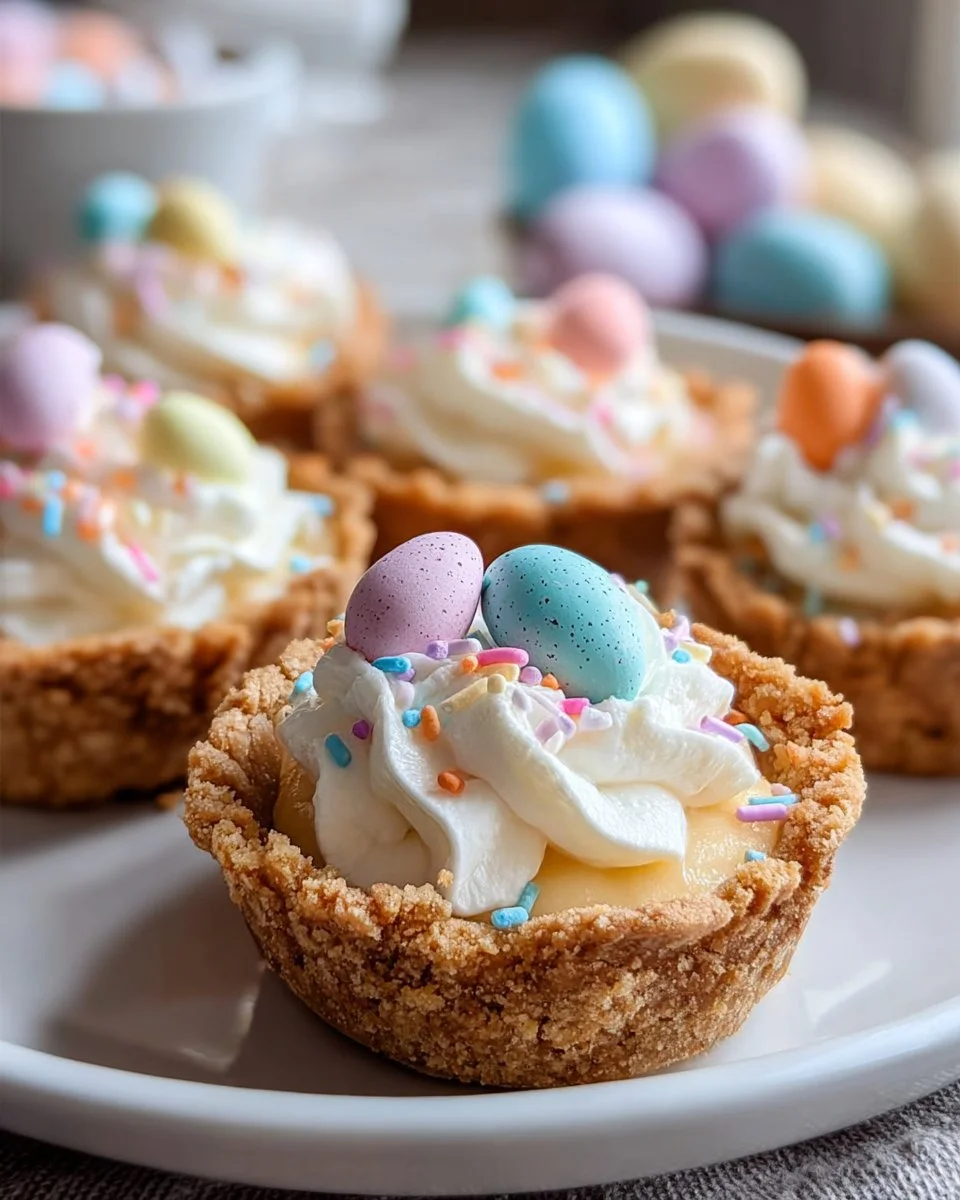
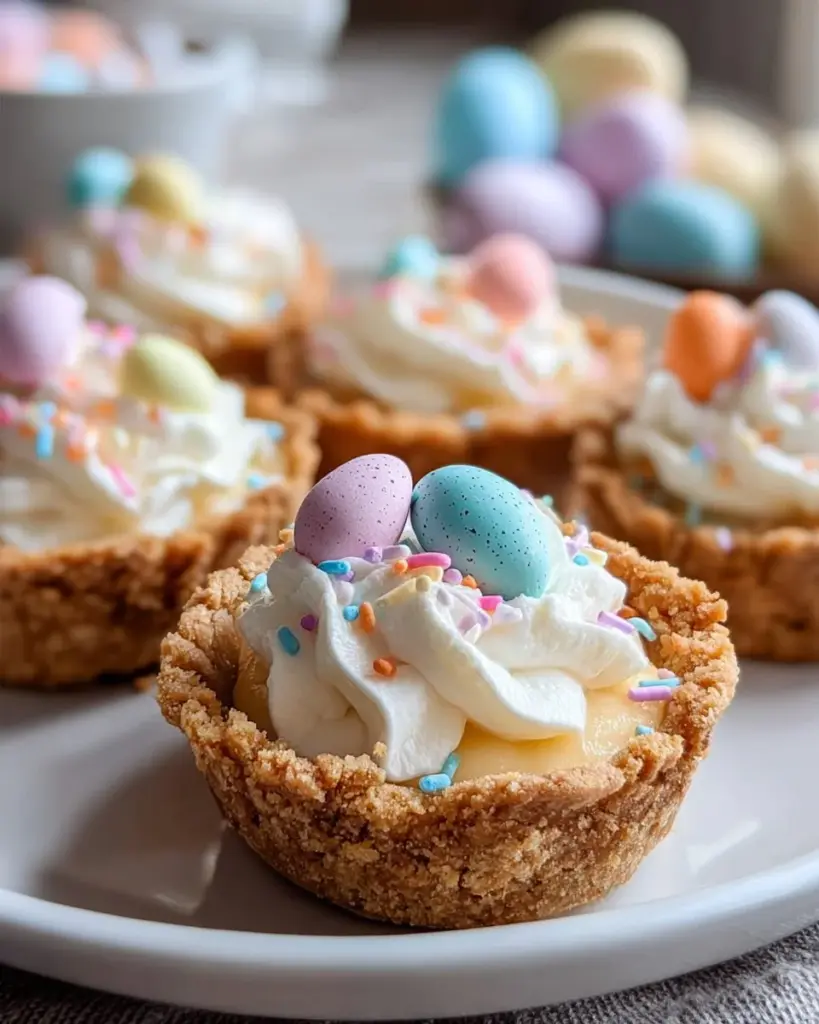
What sets these cookie cups apart from others is their delightful texture—a perfect balance of soft and chewy cookie combined with creamy buttercream frosting. Each bite is a joyful celebration of Easter, topped with colorful candy-coated chocolate eggs and fluffy marshmallow ears. Trust me; these cookie cups aren’t just a feast for the eyes; they are also a source of comfort and warmth, bringing everyone together around the table.
Throughout this post, I’ll share everything you need to know about mastering these delightful cookie cups, from step-by-step instructions to useful tips and tricks. Together, we’ll bring a piece of joy to your spring holiday celebrations!
What Are Easter Bunny Sugar Cookie Cups?
Easter Bunny Sugar Cookie Cups are a whimsical and delicious creation that combines the best of two worlds: soft sugar cookies molded into cute cups and filled with delightful frosting and confections. The idea originated from the traditional sugar cookie but was elevated to a new level with a fun, festive twist. These cookie cups are typically made around Easter, as they embody the playful spirit of the holiday.
When you take a bite, the cookie is tender, slightly crisp on the edges, and the sweet frosting complements it perfectly. The mini chocolate eggs provide a delightful pop of color and crunch, while the marshmallow ears add a fluffy sweetness that takes these treats over the edge. These cookie cups are perfect for family gatherings, spring parties, or just a fun baking afternoon with the kids!
Why You’ll Love This Recipe
-
Adorable Presentation: These Easter Bunny Sugar Cookie Cups are undeniably cute and will wow your guests. They make perfect centerpieces for your dessert table!
-
Homemade Goodness: When you compare these little delights to store-bought cookies, nothing beats the fresh flavor and tenderness of homemade. Plus, you can control the ingredients, ensuring quality and taste.
-
Cost-Effective: Making your cookie cups at home is not only cheaper than buying them at a bakery, but it allows you to create a large batch to share with friends and family—perfect for holiday gatherings!
-
Highly Customizable: You can easily switch up the decorations to suit other holidays or your personal preferences, using different colored candies or even flavored frostings.
-
Easy Recipe: These cookie cups are straightforward to whip up! Even if you’re not an experienced baker, the instructions I’m providing will guide you through each step.
You’ll find that this recipe balances fun, flavor, and creativity, making it an excellent choice for any celebration.
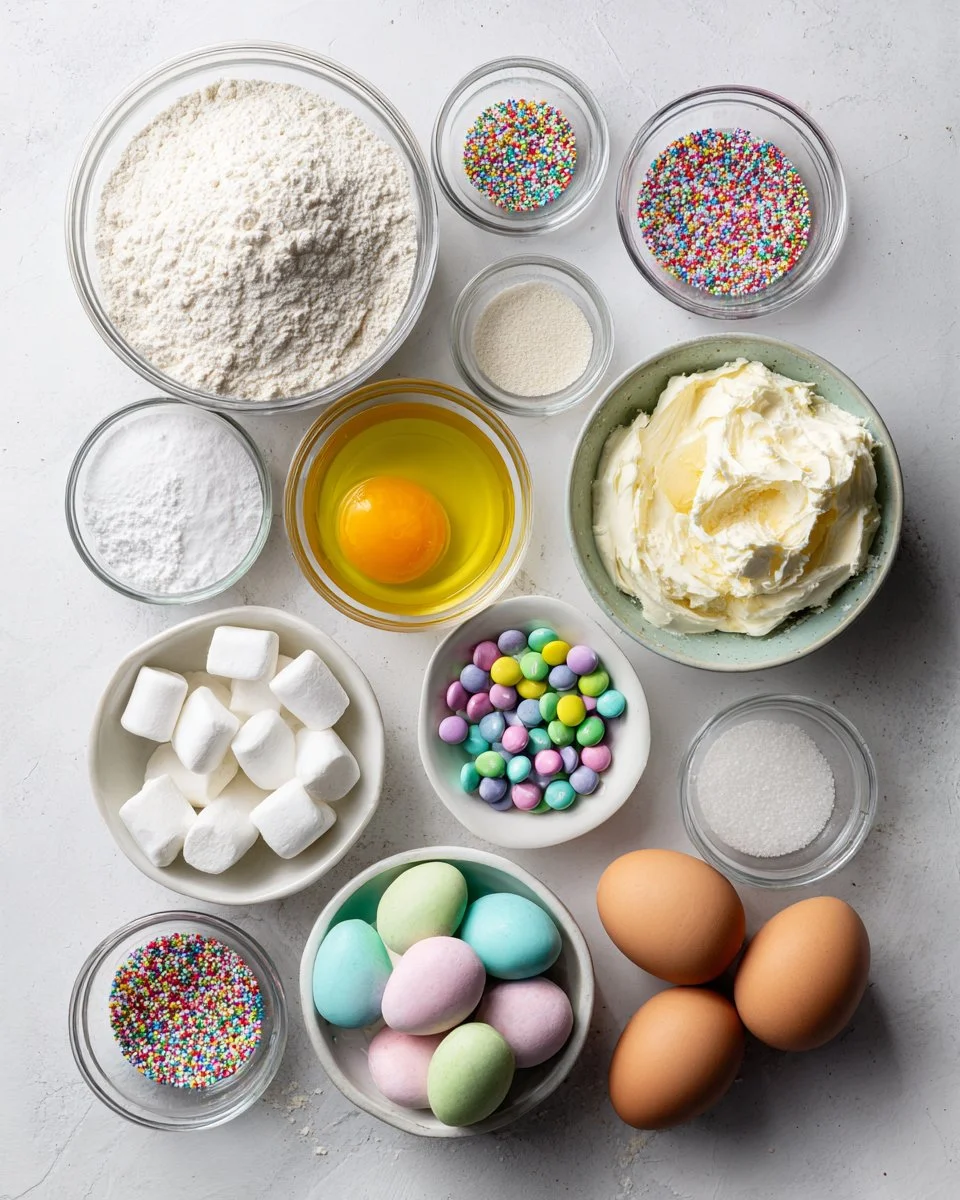
Ingredients
- 2 1/2 cups all-purpose flour – For the base of your cookie cups. Use a high-quality brand, such as King Arthur Flour, for the best texture.
- 1/2 teaspoon baking powder – Gives the cookies a slight lift.
- 1/4 teaspoon salt – Enhances the sweetness.
- 3/4 cup unsalted butter, room temperature – Ensure it’s soft for easy mixing. I recommend using Kerrygold for its rich flavor!
- 3/4 cup granulated sugar – Sweetens the cookie and gives it a lovely texture.
- 1 large egg – Binds the ingredients together.
- 1 teaspoon vanilla extract – Adds wonderful flavor; consider using pure vanilla instead of imitation for the best taste.
- 1 tablespoon milk – Moisture for the dough.
- 1 cup buttercream frosting – For filling! You can make your own or use a quality store-bought option like Betty Crocker.
- 40 mini candy-coated chocolate eggs – For decoration and delightful bites.
- 20 small marshmallows – Make the bunny ears.
- 2 tablespoons spring-colored sprinkles – For that extra festive flair!
Prep Notes
- Make sure your butter is at room temperature to ensure it blends smoothly with the sugar.
- Prepare the muffin tin by greasing it well to prevent sticking.
Step-by-Step Instructions
-
Preheat the Oven: Preheat your oven to 350°F and grease a 12-cup muffin tin. This helps the cups release easily.
-
Mix Dry Ingredients: In a mixing bowl, whisk together the flour, baking powder, and salt until well combined.
-
Cream the Butter and Sugar: In a separate large bowl, beat the room-temperature butter and granulated sugar together until the mixture is light and fluffy—about 3-4 minutes.
-
Add Wet Ingredients: Beat in the egg, vanilla extract, and milk until well combined.
-
Combine Mixtures: Gradually add the dry ingredients to the wet mixture, mixing just until a dough forms.
-
Shape the Dough: Divide the dough into 12 equal portions. Press each portion into the bottom and up the sides of a muffin cup, forming a cup shape.
-
Bake: Bake for 10 to 12 minutes, or until the edges are lightly golden. Keep an eye on them towards the end to avoid overbaking!
-
Cool Completely: Once baked, set the cookie cups aside to cool completely in the tin.
-
Frost the Cups: Spoon or pipe buttercream frosting into each cooled cookie cup.
-
Decorate: Place two mini eggs in each cup and add marshmallow ears by cutting them diagonally. Finish by sprinkling spring-colored sprinkles on top.
Chef’s Tips
- Don’t Overmix: When combining the dry and wet ingredients, mix just until incorporated; overmixing can lead to tough cookie cups.
- Visual Cues: The cookies should be slightly golden on the edges but still look soft; they will firm up as they cool.
Expert Tips & Tricks
- Storage Recommendations: These cookie cups can be stored in an airtight container at room temperature for up to 3 days. If you want to keep them longer, store the unfilled cookie cups in the fridge for up to a week.
- Make-Ahead Instructions: Bake the cookie cups ahead of time, and frost them just before serving to prevent them from becoming soggy.
- Troubleshooting: If your cookie cups puff up too much, press down gently when they come out of the oven to help reshape them without losing their structure.
Serving Suggestions
These adorable Easter Bunny Sugar Cookie Cups are perfect on their own, but they would pair wonderfully with a light fruit salad or a scoop of vanilla ice cream for a delightful dessert spread. Arrange them on a decorative plate, and don’t forget to sprinkle a few extra candy eggs around for visual appeal. They’re excellent for family Easter brunches, spring potlucks, or any festive gathering where you want to spread a little cheer!
Variations & Substitutions
- Flavored Cookie Dough: Consider adding lemon or almond extract for a twist on flavor. You can also incorporate gently mixed lemon zest into the dough for a hint of citrus.
- Dietary Adaptations: For a gluten-free version, substitute gluten-free all-purpose flour. For a dairy-free option, use coconut oil instead of butter and a dairy-free icing.
- Seasonal Changes: Try switching up the candies! For Halloween, swap the eggs for candy corn and marshmallows for pumpkin shapes. For Christmas, use red and green M&Ms instead.
Nutrition & Storage Info
- Prep Time: 30 minutes
- Cook Time: 12 minutes
- Total Time: 42 minutes
- Yield: 12 servings
- Calories per Serving: Approximately 250 calories per cookie cup
Store these cookie cups at room temperature, and they will last up to 3 days. You can keep them in the fridge for a week if unfilled.
FAQ Section
-
Can I use different candies?
Absolutely! You can use any candy you like. Just keep in mind the visual appeal! -
How can I get the cookie cups to hold their shape?
Be sure to press the dough into the muffin tin firmly and avoid overmixing. -
Can I freeze these cookie cups?
Yes! Freeze them unfilled for up to 3 months. Just thaw before frosting and serving. -
What if my cookie cups are too hard?
They might have been overbaked. Make sure you monitor the oven closely for the best results. -
Are these cookie cups gluten-free?
You can make them gluten-free by using a gluten-free all-purpose flour blend. -
What kind of buttercream should I use?
You can use any buttercream frosting you prefer! Store-bought can save time, but homemade is always delicious. -
How can I decorate these for different holidays?
You can switch out the candies and colors for different seasonal themes—just have fun with it! -
Can I make these ahead of time?
Yes! Bake and store the cups ahead, frosting just before serving to keep them fresh. -
What’s the best way to store leftovers?
Keep them in an airtight container at room temperature or in the fridge if unfilled. -
Why are my cookie cups too flat?
This may happen if the dough isn’t chilled prior to baking. A quick chill can help maintain their shape.
Conclusion
Easter Bunny Sugar Cookie Cups are not only a delightful treat to celebrate the season, they also weave in beautiful memories of family traditions and sweetness. With their soft, buttery texture and colorful decorations, they bring a joy that’s hard to resist! I encourage you to dive into this recipe and share these sweet treats with your loved ones. I would love to hear how they turn out for you—drop a comment with your thoughts or any fun variations you come up with. And don’t forget to check out my other festive recipes on the blog for even more inspiration! Happy baking!
Easter Bunny Sugar Cookie Cups
Ingredients
Method
- Preheat your oven to 350°F and grease a 12-cup muffin tin.
- In a mixing bowl, whisk together the flour, baking powder, and salt until well combined.
- In a separate large bowl, beat the room-temperature butter and granulated sugar together until light and fluffy—about 3-4 minutes.
- Beat in the egg, vanilla extract, and milk until well combined.
- Gradually add the dry ingredients to the wet mixture, mixing just until a dough forms.
- Divide the dough into 12 equal portions. Press each portion into the bottom and up the sides of a muffin cup, forming a cup shape.
- Bake for 10 to 12 minutes, or until the edges are lightly golden.
- Once baked, set the cookie cups aside to cool completely in the tin.
- Spoon or pipe buttercream frosting into each cooled cookie cup.
- Place two mini eggs in each cup and add marshmallow ears by cutting them diagonally.
- Finish by sprinkling spring-colored sprinkles on top.