
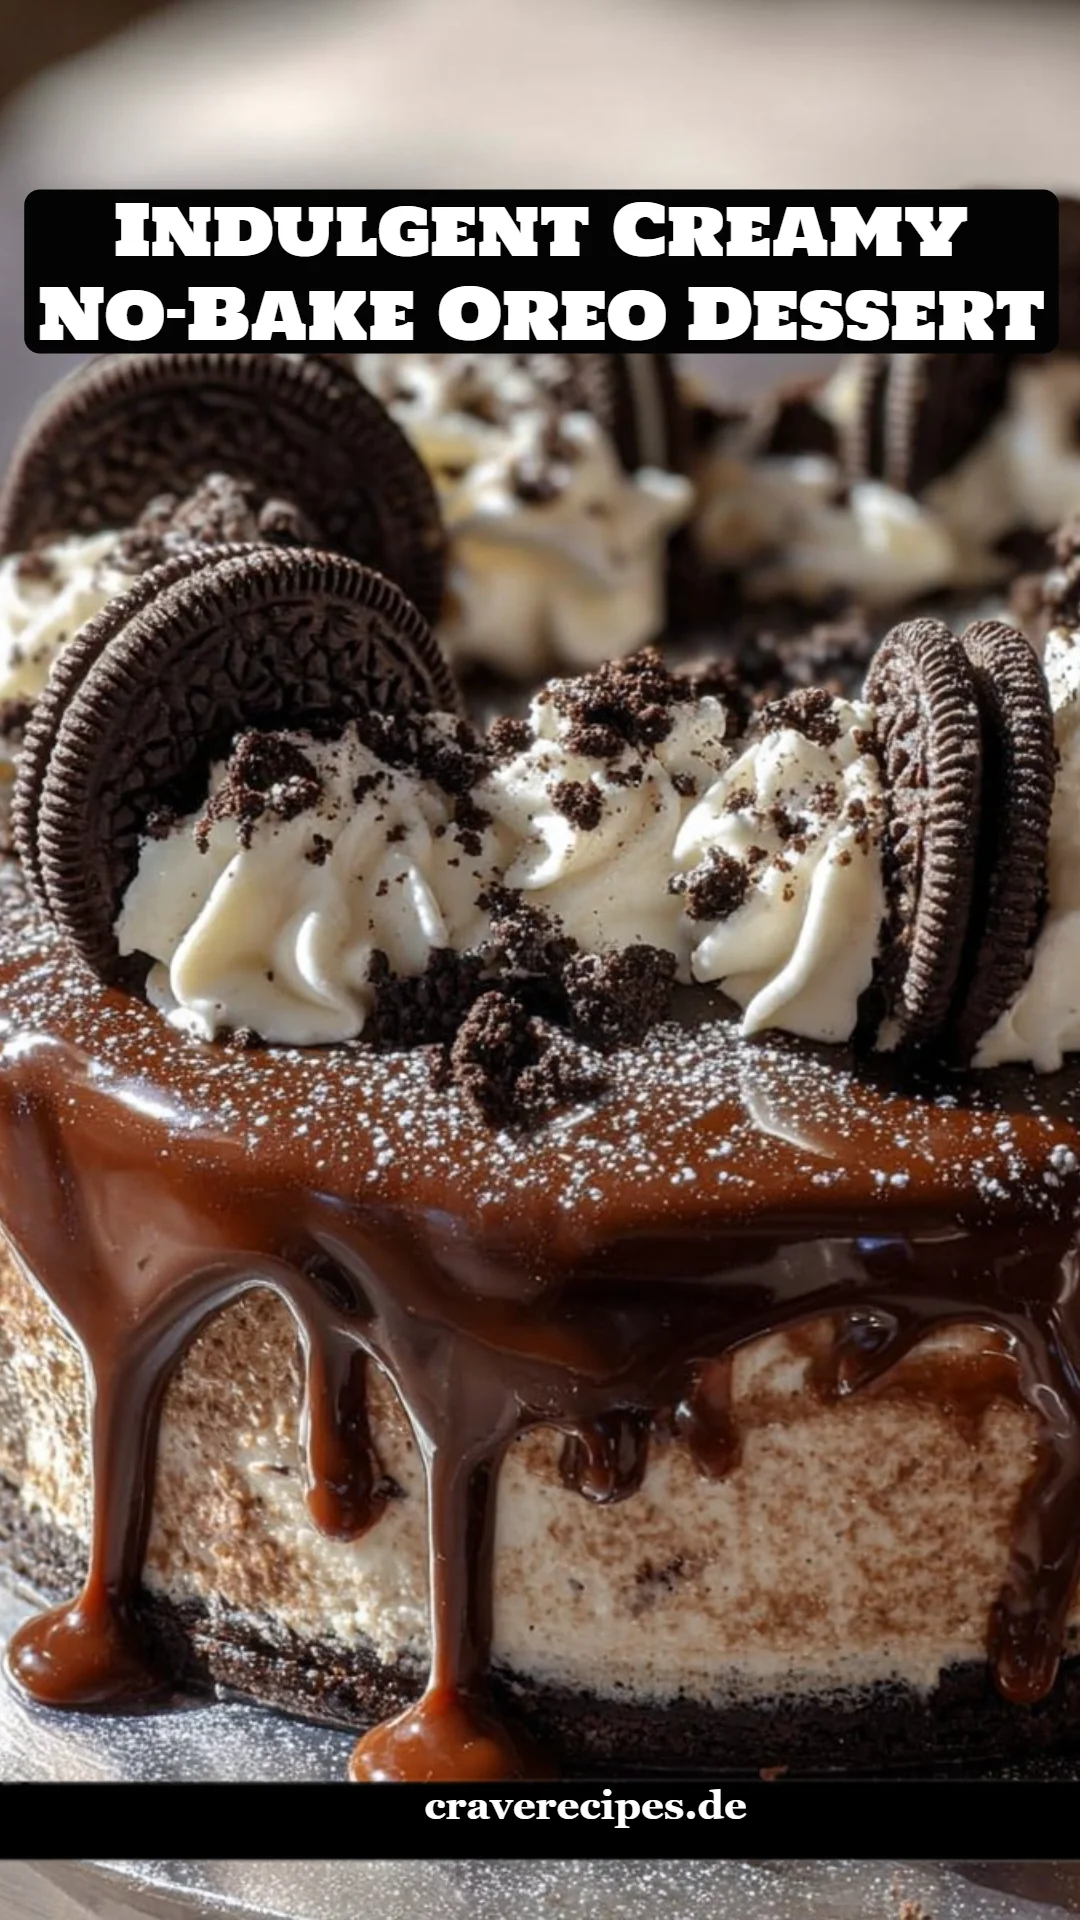
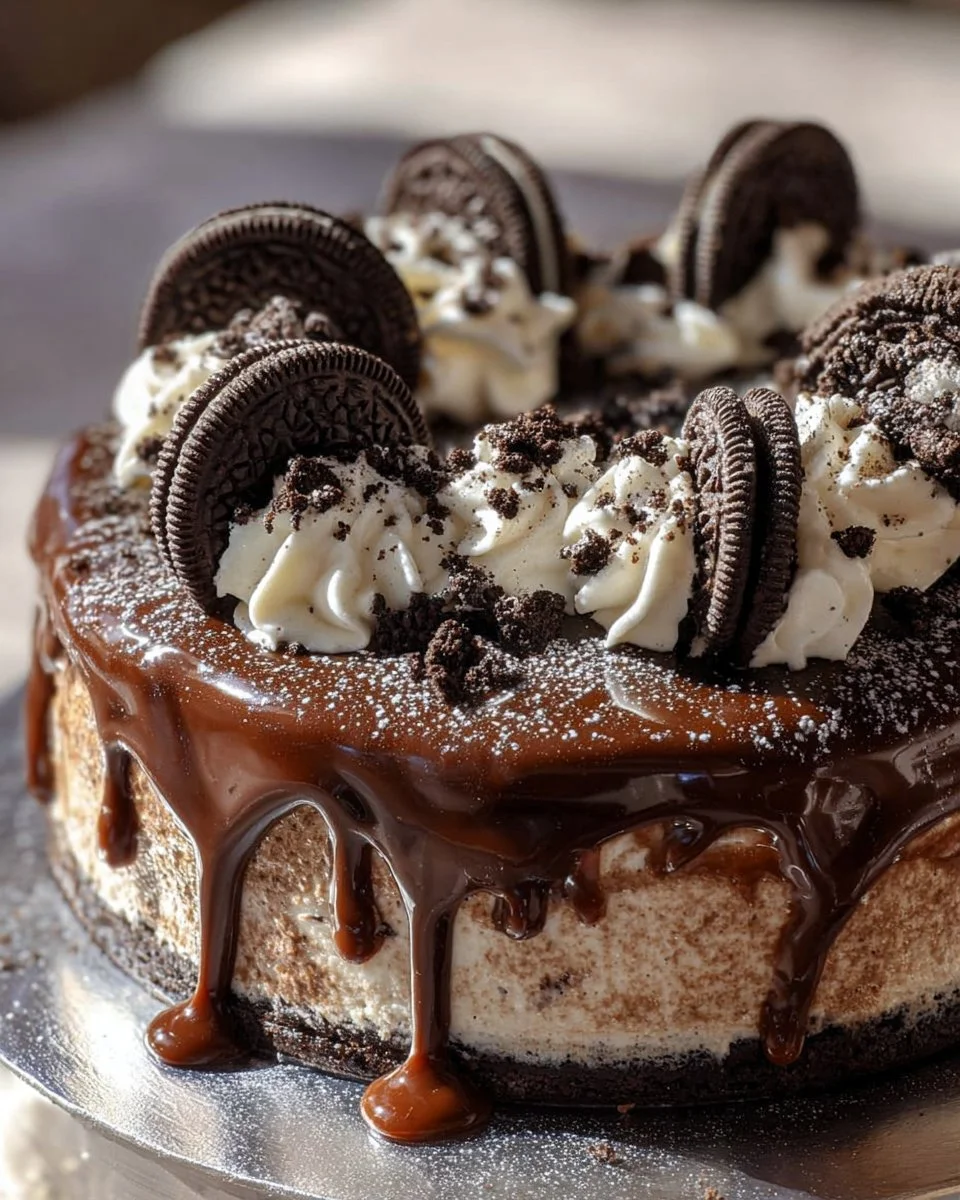
Decadent No-Bake Oreo Dessert: The Ultimate Creamy Indulgence
When I think about family gatherings, my mind often drifts back to those moments in our cozy kitchen, where laughter mingled with the irresistible aroma of baked treats. It was during one of those delightful afternoons that I discovered the joy of creating the Indulgent Creamy No-Bake Oreo Dessert. Trust me, this is not just your average dessert; it’s a heavenly concoction that has the power to transport you back to sweet memories with every creamy bite.
What distinguishes this no-bake treasure from the rest is its effortless preparation and the ability to whip it up without turning on the oven. With layers of velvety cream cheese filling atop a crunchy Oreo base, it’s the perfect balance of textures that keeps hungry hands reaching for more. No more wrestling with tedious baking; this dessert promises satisfaction with minimal effort, making it a staple in my recipe collection.
As you embark on this culinary journey with me, get ready to learn all the insider tips, techniques, and heartfelt stories that will help you create your very own indulgent moment. Prepare to impress family and friends—the only challenge will be keeping everyone from devouring it all at once!
What Are Indulgent Creamy No-Bake Oreo Desserts?
The Indulgent Creamy No-Bake Oreo Dessert has its roots in the classic American dessert trend that emphasizes convenience without sacrificing flavor. They are renowned for their rich, decadent taste, which comes from combining simple ingredients into an extraordinary treat. The crunch of the Oreo cookie crust juxtaposed with the silky, sweet cream cheese filling creates a symphony of flavors and textures in each bite.
This dessert is unique in its versatility; it can adapt to any occasion—be it a summer barbeque, holiday dinner, or cozy family movie night. It’s a truly crowd-pleasing dessert that makes every gathering feel extra special. Plus, the beauty of no-bake desserts is that they require so little cooking time—ideal for those busy evenings when you crave something sweet but don’t want to spend hours in the kitchen.
Why You’ll Love This Recipe
-
Ease of Preparation: The Indulgent Creamy No-Bake Oreo Dessert comes together in a gentle sweep of creativity and doesn’t require any complicated techniques. You can prepare it in under 30 minutes, making it perfect for last-minute plans or spontaneous sweet cravings.
-
Luxurious Flavor: Compared to store-bought desserts, this recipe packs a punch. With real cream cheese and freshly whipped cream, it’s a level above any packaged treat you could ever buy.
-
Cost-Effective: With just a handful of ingredients, this dessert doesn’t break the bank. A few Oreos, cream cheese, and whipping cream combine to create a dessert that tastes like it came from a gourmet bakery!
-
Customization Potential: Feeling adventurous? You can easily swap out the Oreos for other cookies like chocolate chip or peanut butter, or even add layers of fruit or chocolate ganache for a personal touch.
-
No Baking Required: If you’re like me and have a love-hate relationship with baking—especially during those hot, summer months—this recipe saves the day. Just mix, assemble, chill, and serve!
Ingredients
- 200 g Oreo cookies: Opt for the original variety for best flavor. You could also use gluten-free versions if necessary.
- 100 g unsalted butter: Always use unsalted for better control over the dessert’s sweetness. Melt in the microwave or on the stove until just liquid, but not bubbling.
- 250 g cream cheese: Bring this to room temperature for easier mixing; block cream cheese works best for the creamiest filling. Philadelphia is my go-to brand!
- 200 ml heavy whipping cream: Ensure it’s cold before whipping for the best results. Organic brands often have better flavor.
- 100 g powdered sugar: This adds sweetness without the grit of granulated sugar—sift it if it’s clumpy.
- 1 tsp vanilla extract: Always go for pure vanilla extract; the flavor difference is worth it.
Step-by-Step Instructions
-
Crush the Oreos: Place 200 g of Oreo cookies in a sealable plastic bag. Using a rolling pin, crush them into fine crumbs—this is a fantastic way to relieve stress! Set aside.
-
Melt the Butter: In a small saucepan or microwave, melt 100 g of unsalted butter until it’s liquid but not piping hot.
-
Combine the Base: Pour the melted butter over the cookie crumbs, mixing until fully coated. (Chef’s Tip: Use a fork to ensure even distribution!)
-
Form the Crust: Press the crumb mixture firmly into the bottom of a 9-inch springform pan to create an even layer—this step is crucial for a stable base!
-
Beat the Cream Cheese: In a mixing bowl, beat 250 g of cream cheese until smooth and free of lumps.
-
Sweeten the Mixture: Add 100 g of powdered sugar and 1 tsp vanilla extract to the cream cheese, and beat until fully incorporated—this will create a silky filling.
-
Whip the Cream: In a separate bowl, whip 200 ml of heavy whipping cream until stiff peaks form. (Visual cue: it should stand up boldly on the whisk!)
-
Combine Mixtures: Gently fold the whipped cream into the sweetened cream cheese mixture until no streaks remain (be careful not to deflate the cream!).
-
Assemble the Dessert: Spread the fluffy filling evenly over the prepared Oreo crust, smoothing the top with a spatula.
-
Chill: Refrigerate the dessert for at least 4 hours, but preferably overnight, so it sets fully.
-
Garnish: Just before serving, crumble a few extra Oreo cookies on top for that beautiful finishing touch!
Expert Tips & Tricks
- Oreo Variations: Try different flavors of Oreos, like mint or birthday cake, for a fun twist!
- Storage: This dessert can be stored in the refrigerator for up to a week, or in the freezer for up to 3 months.
- Make-ahead: Perfect for meal prep, make it a day or two in advance.
- Troubleshooting: If your mixture is too runny, make sure your cream cheese is fully blended. If the filling isn’t firming up, let it chill longer.
- Serving: Run a knife along the edges of the pan before releasing, for a clean slice every time.
Serving Suggestions
Pair slices of this decadent no-bake dessert with fresh berries, whipped cream, or a drizzle of chocolate sauce. For a picturesque presentation, serve on a beautiful platter and garnish with mint leaves or curl some chocolate shavings on the side. This dessert shines at birthday parties, holiday gatherings, or simply as a sweet treat during family game nights!
Variations & Substitutions
Feeling creative? Here are a few tempting variations you can try:
- Peanut Butter Delight: Swirl in peanut butter into the cream cheese mixture for a nutty flair.
- Fruit-Infused: Layer in sliced strawberries or banana into the filling for a refreshing twist.
- Dairy-Free: Substitute with dairy-free cream cheese and coconut cream for a vegan version.
Nutrition & Storage Info
- Prep Time: 30 minutes
- Chill Time: 4 hours (or preferably overnight)
- Total Time: 4 hours 30 minutes
- Yield: 10 servings
- Estimated Calories: About 350 calories per serving
- Storage Instructions: Store in an airtight container in the fridge for up to 5 days or in the freezer for 3 months.
FAQ Section
-
Can I use other cookies besides Oreos?
Absolutely! You can substitute with any cookie you love—just ensure it has a similar texture. -
Is it necessary to let it chill overnight?
While 4 hours will suffice, overnight chilling guarantees a firmer set. -
Can I make this no-bake dessert gluten-free?
Yes! Just select gluten-free Oreo cookies, and you’re set. -
What can I do if my filling is too runny?
If the filling doesn’t hold, re-whip the cream and gently fold it back into the mixture, then chill longer. -
How do I slice cleanly without making a mess?
Use a hot knife! Dip it in hot water, wipe it dry, then slice through the dessert for clean edges. -
Can I add chocolate chips to the filling?
Yes! They add a delightful touch. Just fold them in after mixing the cream cheese. -
How long does this dessert last in the freezer?
It can be frozen for about 3 months. Just thaw it in the fridge before serving. -
Is there a way to make this dessert lighter in calories?
You can reduce the sugar and cream cheese and replace with Greek yogurt for a lighter option. -
How can I make a layered version?
Simply add layers of fillings or toppings in between the crust and the top layer—be creative with flavors! -
What should I serve it with?
This dessert pairs beautifully with fresh fruit, coffee, or your favorite flavored ice cream.
Conclusion
The Indulgent Creamy No-Bake Oreo Dessert is more than just a sweet treat; it’s a pathway to cherished memories and delightful gatherings. I hope you’ll take the plunge and whip this beauty up in your own kitchen. I’d love to hear how your version turned out—feel free to share your experiences or ask any questions! And don’t forget to check out other delicious recipes on my blog that could be perfect for your next gathering. Happy baking!

Indulgent Creamy No-Bake Oreo Dessert
Ingredients
Method
- Crush the Oreos in a sealable plastic bag using a rolling pin, then set aside.
- Melt the unsalted butter in a small saucepan or microwave until it's liquid, but not piping hot.
- Pour the melted butter over the cookie crumbs and mix until fully coated.
- Press the crumb mixture into the bottom of a 9-inch springform pan to create an even layer.
- In a mixing bowl, beat the cream cheese until smooth.
- Add the powdered sugar and vanilla extract to the cream cheese, and beat until fully combined.
- In a separate bowl, whip the heavy cream until stiff peaks form.
- Gently fold the whipped cream into the cream cheese mixture until no streaks remain.
- Spread the filling evenly over the Oreo crust and smooth the top.
- Refrigerate for at least 4 hours, preferably overnight.
- Crumble extra Oreo cookies on top just before serving for garnish.